How to Make Egg-Free Oatmeal on the Stove

Oatmeal is a comforting and versatile breakfast option that's naturally egg-free. This method focuses on creating a creamy, delicious oatmeal base that can be customized with endless toppings. The gentle cooking process ensures a smooth texture and prevents the oats from becoming gummy, resulting in a satisfying and nutritious start to your day.
Cooking oatmeal on the stove allows for precise control over the consistency and flavor. Unlike instant oatmeal, this method encourages the oats to fully hydrate, resulting in a richer, more substantial breakfast. You can tailor the liquid-to-oats ratio to achieve your preferred thickness, and the slow simmering process allows flavors to meld beautifully.
Understanding Oats
When selecting oats for your breakfast, you'll primarily encounter three main types: rolled oats (also known as old-fashioned oats), quick-cooking oats, and steel-cut oats. Rolled oats are the most common choice. They're steamed and flattened, offering a balance between cooking time and texture. Quick-cooking oats are processed further, resulting in a finer texture and shorter cooking time. While convenient, they can sometimes become mushy. Steel-cut oats, also known as Irish oats, are the least processed; they are simply chopped oat groats. They take the longest to cook but offer the chewiest texture and nuttiest flavor. For this recipe, rolled oats or steel-cut oats are recommended for their superior texture and flavor. Avoid instant oatmeal, as it tends to be overly processed and less flavorful.
Why Cook Oatmeal This Way?
- Versatility: Oatmeal is a blank canvas for flavors. Add fruits, nuts, seeds, spices, or sweeteners to create endless variations.
- Flavor: Stovetop cooking allows the oats to fully develop their natural nutty flavor, enhanced by the slow simmering process.
- Convenience: While it requires slightly more attention than instant oatmeal, stovetop oatmeal is still a quick and easy breakfast option.
Preparation (Mise en Place)
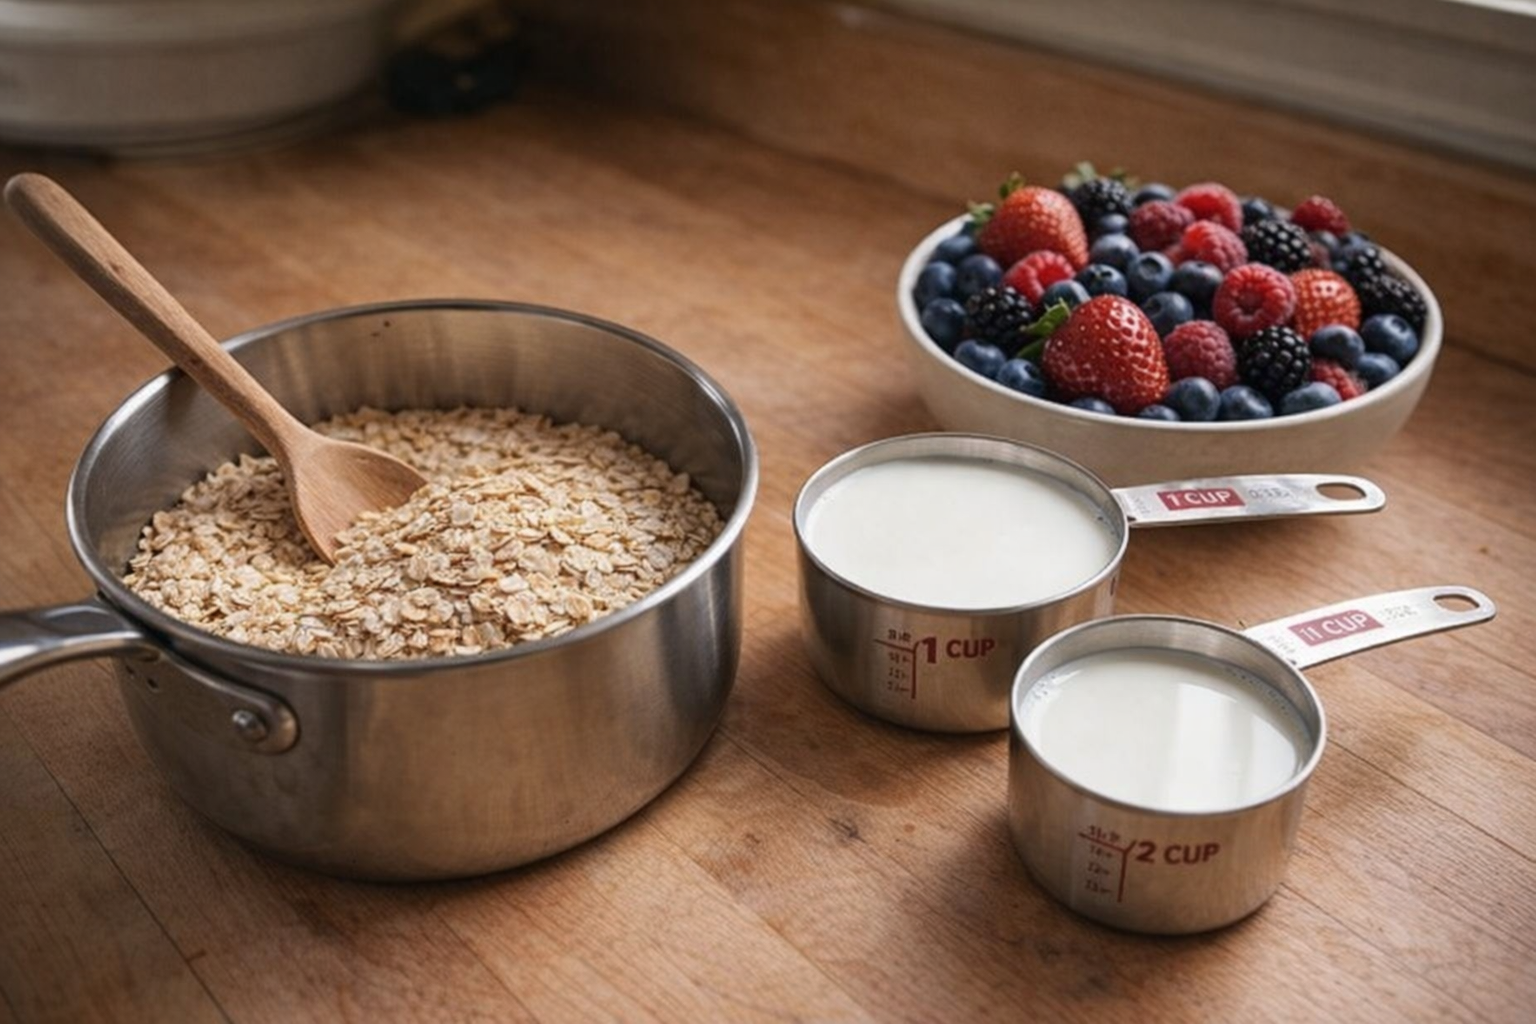
Before you begin cooking, it's important to gather your ingredients and tools. For rolled oats, no pre-soaking is necessary. However, steel-cut oats benefit from a 30-minute soak in water, which reduces cooking time. Measure out your oats and liquid (water or milk) according to the recipe. Prepare any desired toppings, such as chopped fruits, nuts, or sweeteners.
Essential Tools
- Saucepan: A 2-quart saucepan with a heavy bottom is ideal. The heavy bottom helps distribute heat evenly, preventing scorching.
- Measuring Cups and Spoons: Accurate measurements are key to achieving the perfect oatmeal consistency.
- Wooden Spoon or Spatula: For stirring the oatmeal and preventing it from sticking to the bottom of the pan.
The Cooking Method: Creamy Stovetop Oatmeal
Ingredients:
- 1 cup (80g) rolled oats (or steel-cut oats, soaked for 30 minutes)
- 2 cups (473ml) water or milk (dairy or non-dairy)
- Pinch of salt
- Optional: Sweetener (maple syrup, honey, sugar), spices (cinnamon, nutmeg)
- Combine Ingredients: In the saucepan, combine the oats, water or milk, and salt. Stir well to ensure the oats are evenly distributed.
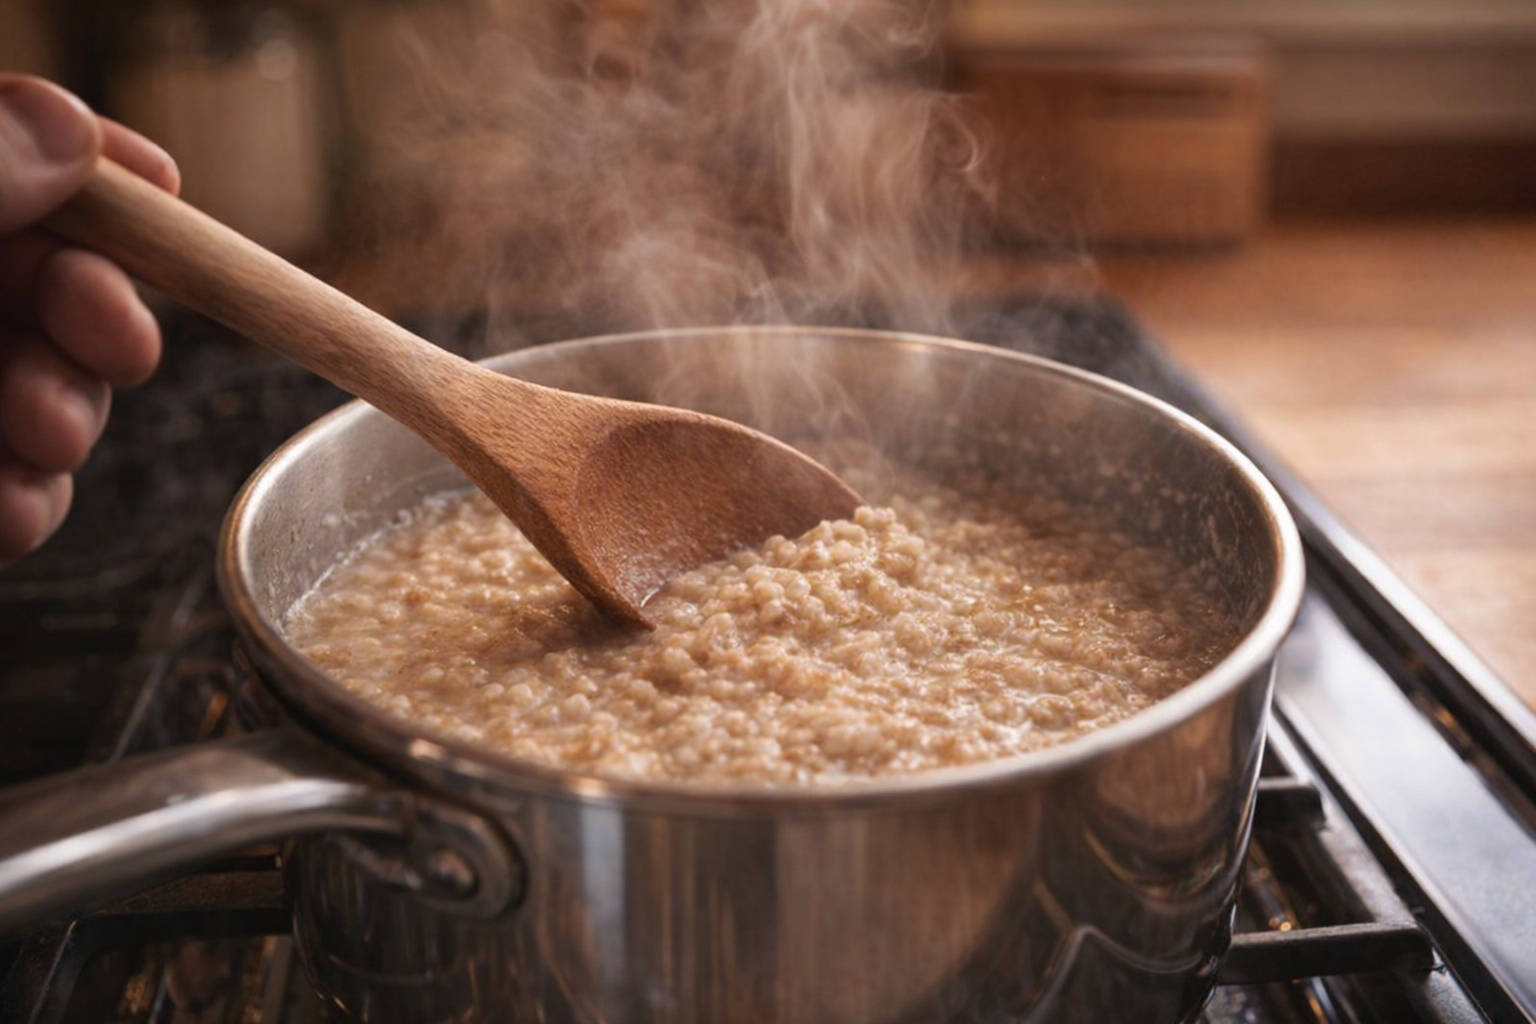
- Bring to a Simmer: Place the saucepan over medium heat and bring the mixture to a gentle simmer, stirring occasionally. You'll notice small bubbles forming around the edges of the pan.
- Reduce Heat and Simmer: Reduce the heat to low and continue to simmer, stirring frequently, for 15-20 minutes for rolled oats or 25-30 minutes for steel-cut oats, or until the oatmeal has reached your desired consistency. The oatmeal will thicken as it cooks. The smell will become nutty and fragrant.
- Adjust Consistency: If the oatmeal becomes too thick, add a splash more liquid. If it's too thin, continue to simmer for a few more minutes.
- Stir in Add-ins (Optional): Stir in any desired sweeteners or spices during the last few minutes of cooking.
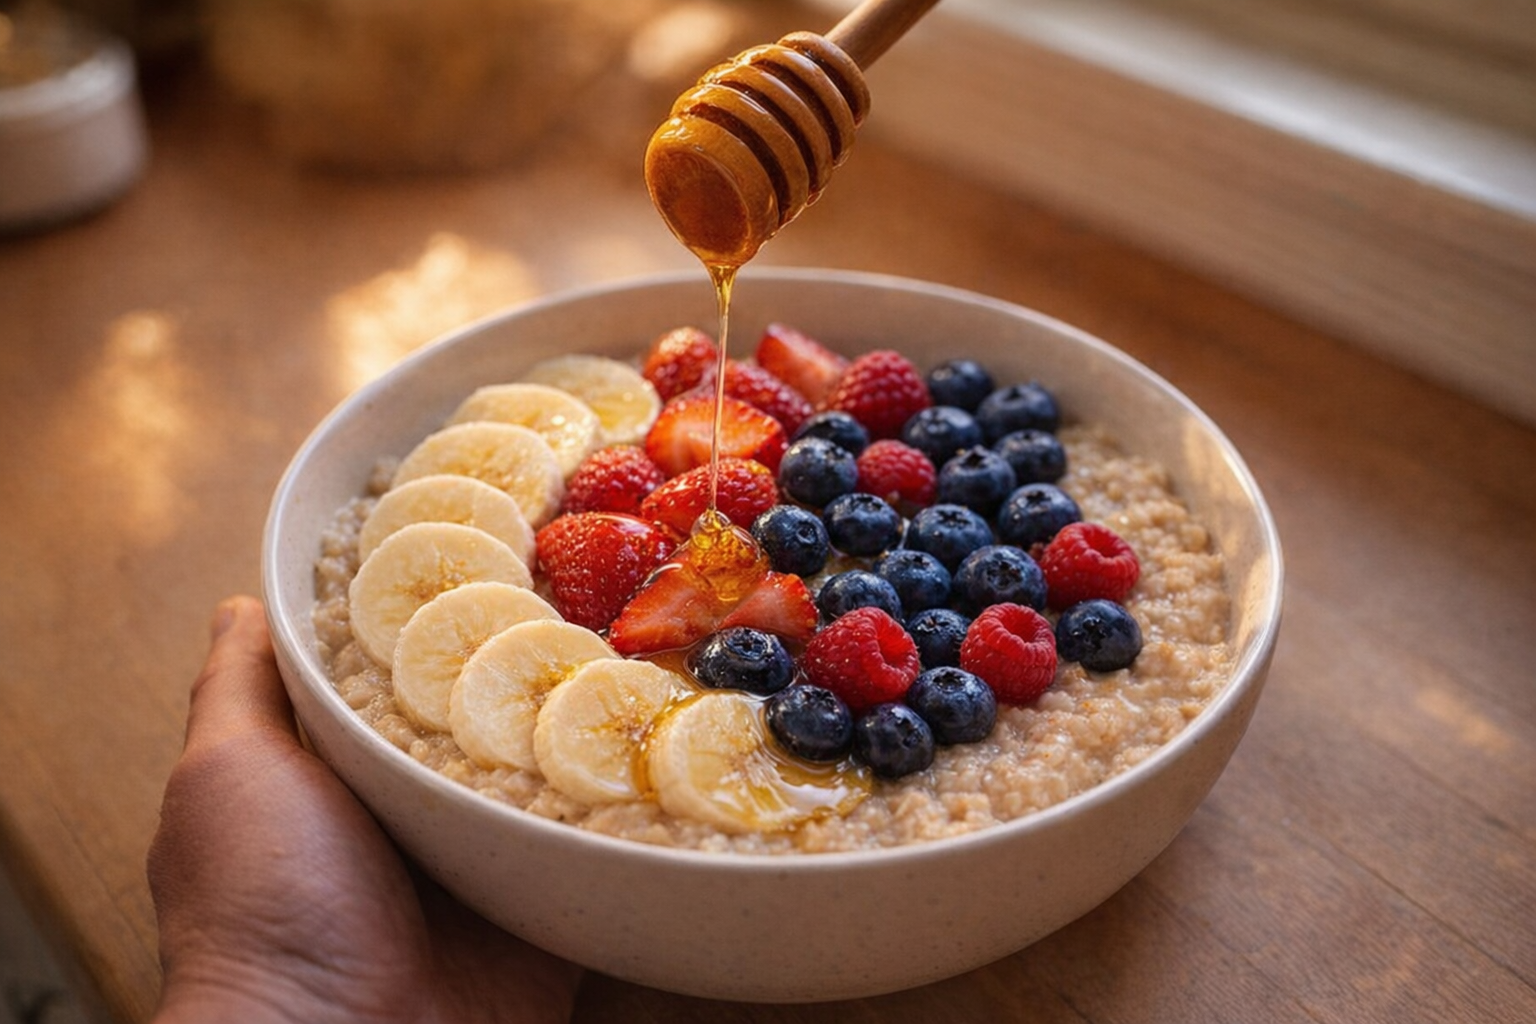
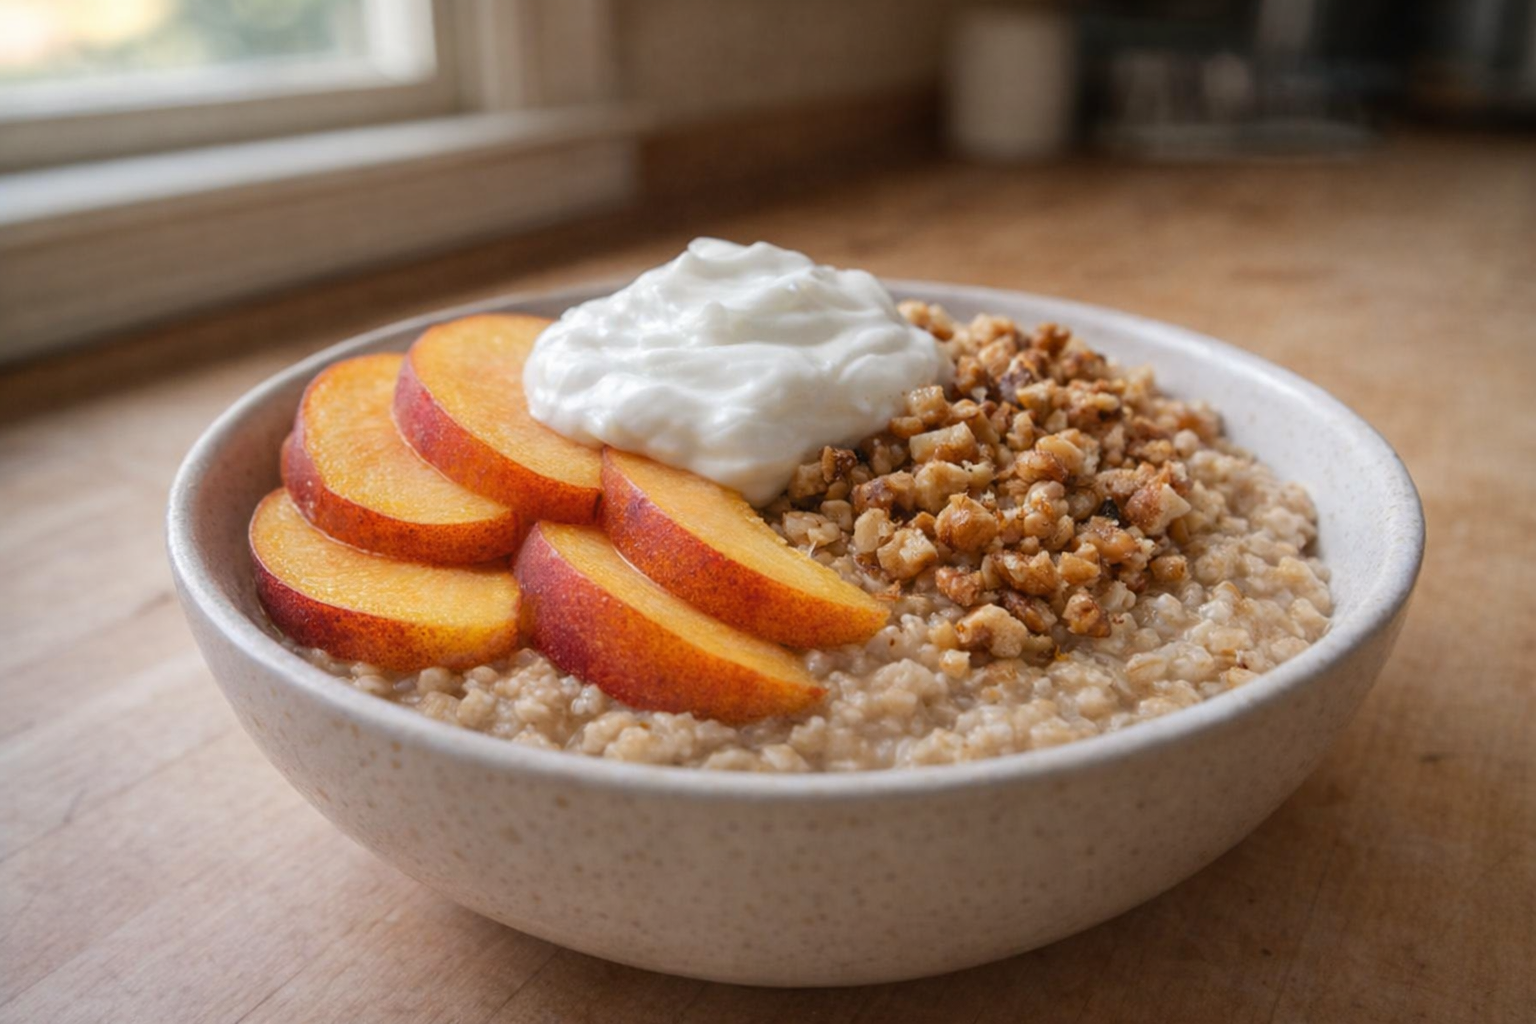
- Serve: Remove from heat and serve immediately. Top with your favorite toppings.
Cooking Time & Doneness Guide
- Rolled Oats: 15-20 minutes
- Steel-Cut Oats: 25-30 minutes
Internal Temperature: Oatmeal doesn't require an internal temperature reading.
Visual Cues
The oatmeal is done when it has thickened to your desired consistency and the oats have absorbed most of the liquid. For rolled oats, the oats should be soft and slightly creamy. For steel-cut oats, the oats should be tender but still slightly chewy.
Tips for Perfection
- Don't Boil: Boiling can cause the oatmeal to become gummy and stick to the bottom of the pan. Maintain a gentle simmer for the best texture.
- Stir Frequently: Regular stirring prevents sticking and ensures even cooking.
- Adjust Liquid to Taste: The liquid-to-oats ratio can be adjusted to achieve your preferred consistency. Use more liquid for a thinner oatmeal and less for a thicker oatmeal.
- Salt is Key: A pinch of salt enhances the flavor of the oats and balances the sweetness of any added toppings.
Storage & Reheating
Leftover oatmeal can be stored in an airtight container in the refrigerator for up to 3 days. To reheat, add a splash of water or milk and microwave on medium power for 1-2 minutes, stirring occasionally, or reheat in a saucepan over low heat. Reheated oatmeal may be slightly thicker, so adjust the liquid as needed.
Serving Suggestions
- Fruit and Nut Bowl: Top with fresh berries, sliced bananas, chopped nuts, and a drizzle of honey.
- Savory Oatmeal: Add sautéed vegetables, crumbled cheese, and a sprinkle of herbs for a savory twist.
- Baked Oatmeal: Combine cooked oatmeal with eggs, milk, and your favorite toppings, then bake in the oven for a warm and comforting breakfast casserole.
- Overnight Oats: Combine rolled oats, milk, yogurt, and your favorite toppings in a jar and refrigerate overnight for a grab-and-go breakfast.
💡 Pro Tips
- Use a gentle simmer rather than a rapid boil to ensure the oats hydrate evenly without becoming gummy.
- Toast the dry oats in the pot for two minutes before adding liquid to bring out a deeper, nuttier flavor profile.
- Stir the mixture frequently during the cooking process to release the natural starches and achieve a creamier texture without any added thickeners.
- Adjust your liquid-to-oats ratio based on your preferred thickness, using more milk for a richer result or water for a lighter taste.
- Allow the oatmeal to rest covered for a few minutes after cooking to finish absorbing the liquid for a more substantial consistency.
Frequently Asked Questions
Yes, you can definitely use milk (dairy or non-dairy) instead of water. Milk will create a richer and creamier oatmeal. Just be sure to watch it carefully as milk can scorch more easily than water, so stir frequently.
If your oatmeal is too thick, simply add a little more liquid (water or milk), one tablespoon at a time, while stirring. Continue cooking over low heat until it reaches your desired consistency. Remember it will thicken slightly as it cools.
Leftover oatmeal can be stored in an airtight container in the refrigerator for up to 3-4 days. To reheat, add a splash of liquid and microwave or heat on the stovetop, stirring occasionally, until warmed through. You may need to adjust the liquid again to reach your desired consistency.
Yes, you can still make oatmeal without a heavy-bottomed saucepan. Just be sure to cook the oatmeal over low heat and stir it more frequently to prevent it from sticking or scorching. Keeping a close eye on it will help ensure even cooking.